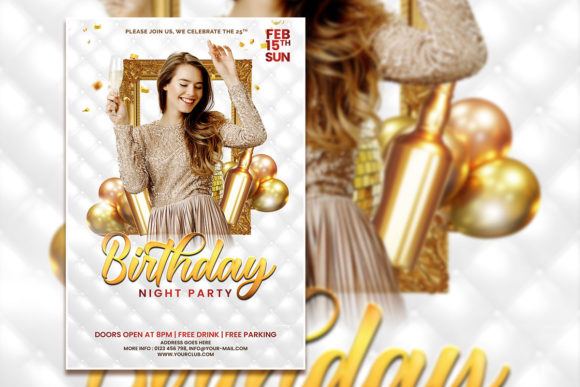
Crafting the Perfect Invitation: Mastering the Modern Style Birthday Party Template
Planning a birthday celebration is exciting, but designing the invitation or promotional flyer can quickly turn into a stressful task. The "Modern Style Birthday Party Template" is designed to give you a professional, polished look without requiring a graphic design degree. However, simply downloading a PSD file and opening it in Photoshop is not the finish line. To get the most out of your purchase and avoid the common pitfalls that lead to blurry prints, scrambled text, or a generic look, there are a few critical details you need to understand upfront. Whether you are a busy parent, a small business owner hosting an event, or a content creator producing social media assets, this guide will walk you through the practical steps to make your template work flawlessly.
Before You Click "Buy": Matching the Template to Your Needs
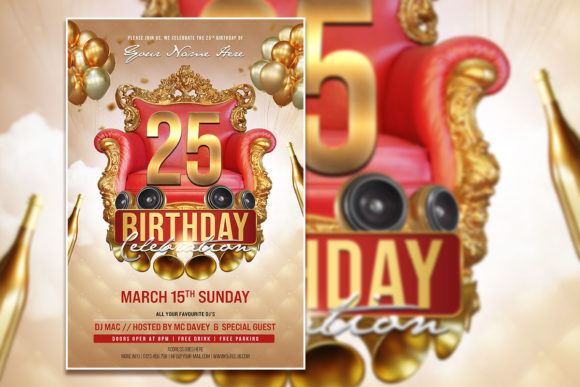
It is easy to fall in love with a design based on the demo image. But a "Fully Editable Birthday flyer template" is an investment in your event's presentation. Before purchasing, take a close look at the technical specifications. The dimensions here (2000 x 3000 pixels at 300dpi) offer excellent flexibility. This resolution is high enough for quality digital sharing and standard print sizes. One common oversight is ignoring the color mode. This file comes in RGB, which is perfect for digital screens, social media invitations, and tickets. If you plan on taking the flyer to a commercial printer for large-format posters, you will likely need to convert it to CMYK and understand how the colors shift. Always think about your primary use case first. Will this be an Instagram story, a high-quality printed card, or a large banner? The "Modern Style" aesthetic works beautifully for a wide range of events, but ensure the geometric shapes and typography match the personality of the birthday honoree. Checking these details now saves you from format-related headaches later.
The "Editable" Misunderstanding: What Beginners Get Wrong
The term "editable" can sometimes lead to unrealistic expectations. Let's clarify what a "Photoshop Template - Instant Download" truly provides. You are receiving a pre-built, layered PSD file. This gives you a massive head start, but it is not a fully automated app. The number one mistake beginners make is assuming the template does all the work for them. In reality, it provides a flawless structure—the color palette, typography hierarchy, and photo mask are all set. Your job is to insert your specific details.
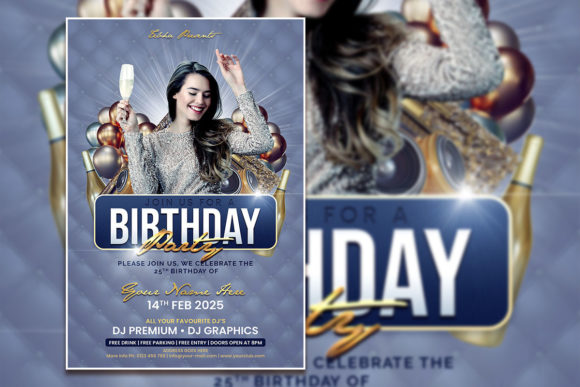
Another misunderstanding is that "Fully Editable" means everything will work exactly like the preview without any effort. The preview features perfectly matched placeholder text and professional stock photos. To achieve that same polished look, you need to replace the placeholder text with your own using the Text Tool and swap the stock photo with a high-resolution image of your own. Don't leave the stock photo in place. The purpose of buying the template is to customize it until it reflects your unique event. The included JPG file is useful for quickly viewing the design on your computer or sharing a draft, but the real magic happens when you dive into the PSD layers. Remember to read the TXT help file immediately after download—it contains crucial links to the exact fonts used, a step many users skip and later regret.
Three Critical Errors That Ruin a Good Flyer Template
You have the template open in Adobe Photoshop. Everything looks great. Then you try to edit, and something goes wrong. Here are three specific errors that can sabotage your project and how to avoid them.
Error 1: The Font Fumble
The most common frustration occurs with fonts. The designer used a specific modern sans-serif or display font to achieve that clean "Modern Style Birthday Party Template" look. When you open the PSD without those fonts installed on your computer, Photoshop substitutes a default font like Arial or Times New Roman. This completely breaks the design's aesthetic. The fix is straightforward. The product description clearly states that a font download link is included in the help file. Before you even begin editing, open the TXT file, download the recommended fonts, and install them on your system. Once installed, close and reopen the PSD. The text will render perfectly as intended. Skipping this tiny step is the fastest way to turn a polished design into a frustrating editing session.
Error 2: The Photo Disaster
The template uses a high-resolution placeholder image scaling up to 2000x3000 pixels. A common mistake is replacing that image with a tiny, low-resolution photo grabbed from a phone or social media platform. The result is a blurry, pixelated mess that ruins the professional look. The fix is to match quality with quality. Use a photo that is at least as large as the space you are filling. The editable nature of the template allows you to easily place your image using the clipping mask or layer structure provided. Using "File > Place Embedded" is your safest option. If your photo is slightly smaller than the frame, use the transform tool (Ctrl+T) to scale it down, never up. Upscaling a small image always leads to visible pixelation. Take the time to select a sharp, well-lit photo, and your flyer will look custom-made.
Error 3: Ignoring the Safe Zone
Whether you are posting this online or sending it to a printer, edges often get cut off. Instagram crops squares into rectangles. Printers have a slight margin of error during cutting. The mistake is placing critical text or faces right at the edge of the 2000x3000 canvas. The fix is to keep all essential elements—the name, date, and key graphics—comfortably inside the center of the frame. Consider the outer ten to fifteen percent of the flyer as a buffer zone that can be cropped without losing important information. This ensures your "Birthday Celebration Flyer Template" translates perfectly across different formats, whether it is a Facebook cover photo, an email invite, or a printed poster.
Practical Workflow: How to Edit Like a Pro
Now that you know what to avoid, here is a simple and effective workflow for using your "Birthday Celebration Editable PSD Template."
- Organize Your Assets: Gather your photos, finalize the event details including date, time, and venue, and download the fonts from the help file. Install the fonts before opening Photoshop.
- Open and Navigate: Open the PSD file. Locate the Layers panel under Window > Layers. The file comes with well-organized folders and named layers. Look for the Text groups and the Photo layer.
- Edit the Text: Select the Horizontal Type Tool (T). Click on the existing text. The instructions clearly state that you can simply select text with the text tool and replace it with your own. Highlight the placeholder text and type your details. Adjust the size or color if needed using the Character panel.
- Replace the Photo: Go to File > Place Embedded. Navigate to your high-quality image. Click and drag it into position. Right-click the image layer and choose "Create Clipping Mask" if it isn't already masked so it fits perfectly into the smart object frame provided.
- Save and Export: Save your work as a PSD to preserve all layers for future edits. For sharing online, export a JPG using File > Export > Export As. For printing, save a high-quality JPG or PDF.
Digital vs. Print: Choosing the Right Output
A "Modern Style Birthday Party Template" like this one is versatile. The 300 DPI resolution is a high standard that works well for both screen and print. However, a common mistake is using the exact same RGB file for commercial offset printing without checking requirements. For digital invitations, social media graphics, or even print-at-home cards, the original RGB color space is perfect and offers vibrant colors. If you are sending this to a professional print shop for posters or banners, ask for their specific requirements. They may need a CMYK conversion, a specific PDF preset, or bleeds added to the canvas. Because your template is fully layered, you can easily tweak the output. Just be aware that RGB colors, especially bright blues and greens, can look slightly different when printed in CMYK if you do not soft-proof the file first. Taking this extra step ensures your printed materials match your digital vision.
The "Fully Editable Birthday flyer template" is a powerful tool for creating a memorable and professional birthday announcement. By understanding its structure, respecting font licensing, preparing high-quality images, and planning your output format, you can avoid the common frustrations that plague DIY design. Take a few minutes to organize your assets and read the help file before you start. Doing this will transform a simple "Photoshop Template" into a stunning, personalized keepsake that perfectly captures the celebration. The only thing left to do is enjoy the party.