Nuansa Google Slide Template: What Most Users Get Wrong (and How to Fix It)
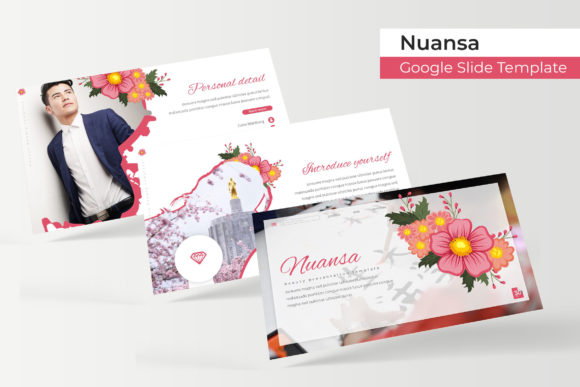
Presentation templates promise a polished, professional look with minimal effort. Yet many users end up with slides that feel clunky, inconsistent, or simply don’t tell their story well. The Nuansa Google Slide Template offers a generous toolkit — 150 total slides across five premade color variations, each with 30 carefully designed slides. But even the best template can fall flat if you approach it the wrong way. Below are the most common mistakes people make when working with this template (or any similar presentation system), along with practical corrections that will help you get the most out of your purchase.
Mistake #1: Treating the Template as a One-Size-Fits-All Deck
A common error is to assume that all 150 slides must be used in a single presentation. The Nuansa template includes five color variations (30 slides each). Trying to combine all five colors into one deck creates a visual mess. Even if you like multiple palettes, forcing them together breaks the visual consistency your audience expects.
Better approach: Pick one color variation and stick with it for the entire presentation. The template’s 30 slides are more than enough for most presentations — you’ll have slides for introduction, section breaks, infographics, galleries, portfolios, and closers. If you need additional slides, duplicate existing ones from the same color set rather than borrowing from another. This keeps your brand or message clear and professional.
Mistake #2: Ignoring the Master Slides and Overediting Each Slide Individually
Many beginners jump straight into editing slide content one by one. They move text boxes, resize icons, and change fonts manually on every slide. This is not only time-consuming but also breaks the pixel-perfect design the Nuansa template provides. The illustrations and graphics are crafted to work together; moving them even slightly can cause alignment or spacing issues.
Better approach: Use the master slides (Slide > Edit Master). The Nuansa template is built on master slides, so changing a font style, background color, or placeholder position in the master will update all related slides instantly. This preserves the original design integrity and saves hours of work. Reserve individual slide edits only for content-specific adjustments like swapping an image or rewriting a bullet list.
Mistake #3: Overlooking the Handcrafted Infographics and Portfolio Slides
Many users focus only on standard text-and-image slides and skip the specialized sections like infographics, gallery, and portfolio slides. This is a missed opportunity. The Nuansa template includes handcrafted infographic elements that can turn boring data into compelling visuals. Similarly, the gallery and portfolio slides are ideal for case studies, product showcases, team photos, or client work.
Better approach: Look through all 30 slides in your chosen color variation before building your presentation. Identify which slides could benefit from an infographic (e.g., stats, timelines, processes). Use the portfolio or gallery slides when you want to highlight multiple items without overcrowding. These built-in layouts are already designed for visual hierarchy, so you just need to drop in your content.
Mistake #4: Misusing Picture Placeholders and Drag-Drop Features
The Nuansa template provides picture placeholders with a drag-drop function. A typical mistake is to insert images directly over the placeholder without using the placeholder tool, or to resize the image before dropping it in. This can result in distorted proportions, cropped faces, or images that don’t fit the intended frame.
Better approach: Always drag your image onto the placeholder icon. The placeholder will automatically crop and scale the image to fit the frame perfectly. If you need to reposition within the frame, double-click the image and adjust the crop. Never resize the placeholder itself unless you plan to update the master slide. For best results, use high-resolution images — the preview photos shown in the demo are for illustration only and are not included, so plan your own photography or use stock images that match the color theme.
Mistake #5: Neglecting Font Licensing and File Compatibility
Templates from Nuansa come with a README file and a link to download the free fonts used. Yet many people skip this step, assuming their system fonts will work. When the presentation is opened on another device or shared as a PDF, the fonts may fall back to a generic substitute, ruining the typographic harmony.
Better approach: Download and install the recommended free fonts before you start editing. The Nuansa template is designed with specific typefaces that complement the overall look. Once installed, your edits will stay true to the design, and you can confidently export to PDF or present live. Also check that you are using the correct PPTX file — the package includes five color-specific PPTX widescreen files. Opening the wrong one can lead to mismatched colors.
Mistake #6: Overcustomization — Changing Too Much and Losing the Template’s Strength
It’s tempting to treat a template as a starting point and radically alter fonts, colors, icons, and layout structures. But the Nuansa template is described as pixel-perfect, meaning every element is precisely placed and balanced. Drastic changes often introduce inconsistency, misalignments, and a less professional end result.
Better approach: Use the five premade colors as your palette. If you absolutely must change a color, stick to one or two swaps within the same hue family. Keep the original icon style and illustration approach; they were designed to work together. For unique branding, you can update the logo and primary accent color in the master slide, but leave the supporting elements as they are. This way you get a custom feel without sacrificing the template’s polished, cohesive look.
How to Evaluate the Nuansa Template Before You Buy
If you’re still deciding whether to purchase, check for a few things. First, confirm that the 150 total slides (30 per color, 5 colors) meet your project needs. If you only need one presentation, you’re essentially buying five themes for future use. Second, look at the included slide types — does it have the section breaks, portfolio, and infographics you need? Third, verify that the font download link is active and the README file explains setup clearly. Finally, remember that the preview photos are not included (they are for illustration only), so have a plan for sourcing your own imagery.
A Practical Workflow for Best Results
- Pick your color and open the corresponding PPTX file.
- Install the recommended fonts from the provided link.
- Edit the master slide if you need global changes (logo, background, typography).
- Duplicate the needed slide layouts (e.g., one infographic, two portfolio, etc.).
- Drop in your images using the placeholder drag-drop feature.
- Adapt text and data without moving elements around.
- Review in slideshow mode to check alignment and transitions.
- Export to PDF or present directly from Google Slides if you prefer the web version.
Following these steps will help you avoid the common pitfalls that reduce the impact of a professionally designed template. The Nuansa Google Slide Template gives you a strong foundation — use it wisely, and your audience will notice the difference.